Brooklyn Hoodie Sew Along: Making the Pockets
Posted by Betsy C on

Let the sewing begin! The first order of business, the pockets. This is the area that you need to be the fussiest about. Feel free to unleash the perfectionist beast at this time.
- Turn back the pocket opening edge and press in place (optional: either use your serger to finish the edge or turn inside edge in again to have a clean finish).

- Stitch the pocket opening edge approximately 3/4" (1.9 cm) or width that will be closest to the edge of the pocket opening inside. I like to do this on the right side of the garment to ensure that topstitching looks good on the outside.

- If you are sewing with French terry it will have a tendency to stretch after sewing. You can scrunch up the excess length and apply a generous amount of steam with your iron to coax it back into shape. After steaming, press with dry heat to set it.

- Turn in the top edge and side of the pocket 3/8" (1cm)
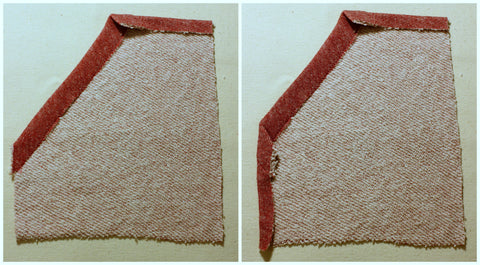
- Important: Do the pressing for both sides pockets at the same time so you can stack one on top of the other to compare shapes. Make adjustments as needed.

- Also check that the pocket shape matches back to the pattern piece. Trim if necessary.

- Before the pockets are attached we need to stabilize the center front edge so it does not stretch so much. If you allow it to stretch the pockets can become uneven and the zipper will appear too short. My suggestion is to use fusible/interfacing tape. It is a good investment to make and apply to any edges that stretch too much on knits or woven. However, if you cannot find the same, then cut the narrowest strip of fusible/interfacing that you have on hand, which will serve the same purpose.

- Apply the fusible/interfacing to the edge of the center front on the wrong side. I suggest placing about 1/4-3/8" (1cm) from the edge so the tape will get sewn into the zipper eventually.

- Position the pockets on the front panels. The top center pocket edge (where my finger is pointing)- I like to angle this down a tiny amount. This will compensate for stretching that occurs when worn (sides droop) so it appears level.

- Baste the bottom and center front edge of the pocket in place.

- This photo shows the angle a little better. Also important, ensure that pocket positions are mirror image from right to left and one is not higher or lower then the other.

- Stitch down the sides and the tops of the pocket bags.

Coming up next 1/11: Sewing the body and sleeves
Share this post
0 comment